
Posted on April 6, 2021 by KylieMawdsley
‘Use What You Have’ Decorating Ideas & Fixes!
Updating ANY room in your home can be expensive and stressful and time-consuming AND, well, you get the point. That’s why today, we’re going to talk about 3 ways you can FIX and REDECORATE – without even leaving your house! That doesn’t mean you can’t shop ONLINE though – just joking Tim (kind of…).
When it comes to decorating and design, it’s not that hard to create a beautifully decorated space when you buy everything brand-spankin’ new, hire a designer and take visual cues from Pinterest and Houzz, and if that’s your jam, that’s cool with me. But, not everyone can afford to do that – sometimes you gotta work with whatcha got (says my Aunt who claims I got my Grandma Mack’s hips).
Personally, I love the idea of a home that’s evolved, that has artwork and decorative pieces that aren’t on the shelf at your local Home Sense or Pier 1, pieces that have sentimental value – they tell a story. Maybe it’s your Grandma’s porcelain figurine or your daughter’s first painting – that’s what makes a home feel inviting to me. And that’s what this blog post is about…
Using what you ALREADY HAVE to create a beautifully decorated space, by displaying your pieces in a way that WORKS

So, get ready to open up those old china cabinets, purge the attic and crawlspace and steal items from one room to use them in another – it’s going to be FUN, especially if you have a glass of wine in hand (and a bottle/funnel close by).
Ready Betty?
1. The Right Height to Hang Artwork Above ANYTHING
First up – let’s get your artwork hung at the right height, rather than hanging on whatever nail was already in the wall or at the 6′ foot level as your 6’4 hubby says it looks better that way.
And please note, these are only GUIDELINES, not rules (no wet noodle slaps here). There are always exceptions as there are TONS of artwork sizes, wall sizes and other things to consider when hanging artwork – you’ve got room to play around.
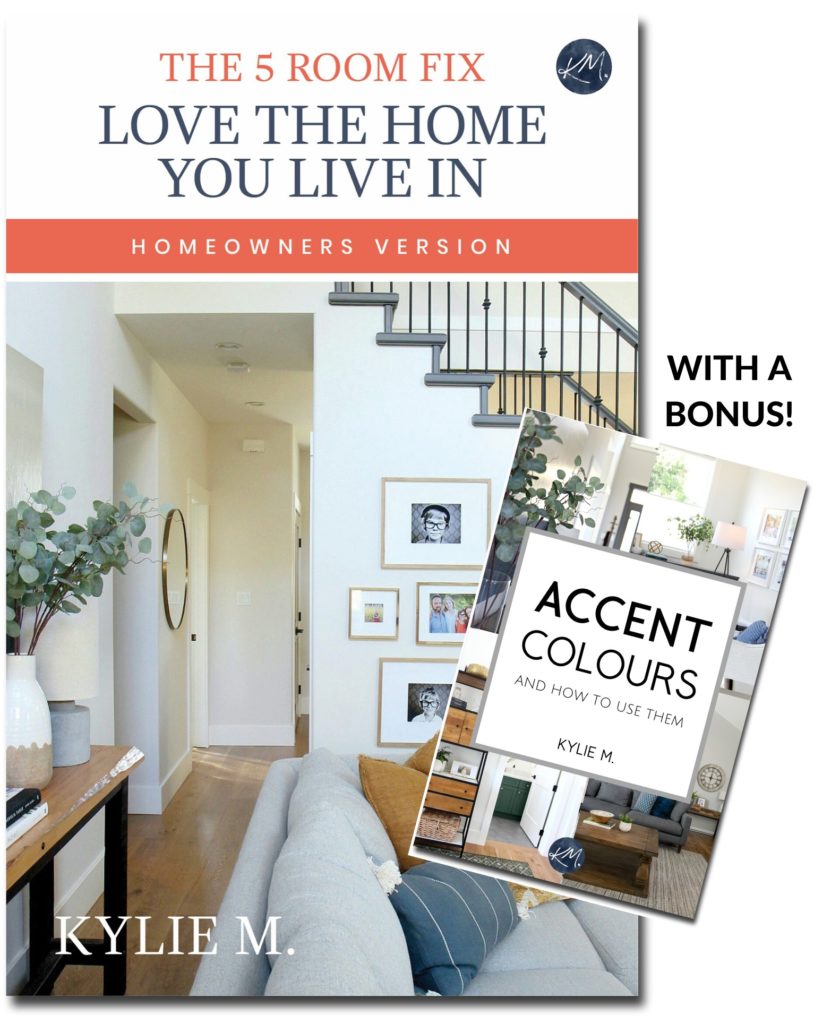
I went into the guts n’ glory of hanging artwork in my e-book, ‘The 5 Room Fix – Love the Home You Live In‘, but there are some GREAT basics that I can cover right here.
THE RIGHT HEIGHT FOR AVERAGE* SIZE ARTWORK HANGING ON A BARE WALL
*average size is approximately 8-32 inches tall
And that MAGICAL NUMBER IS…60 inches (5 feet). That’s 5 feet from the floor to the center of your artwork. It doesn’t matter how tall your hubby is or how high your ceilings are, this is about what looks good on the active, viewable wall space – capiche? I actually like to give a little wiggle-room by allowing approx. 58-62″ as it will accommodate a wider variety of sizes.
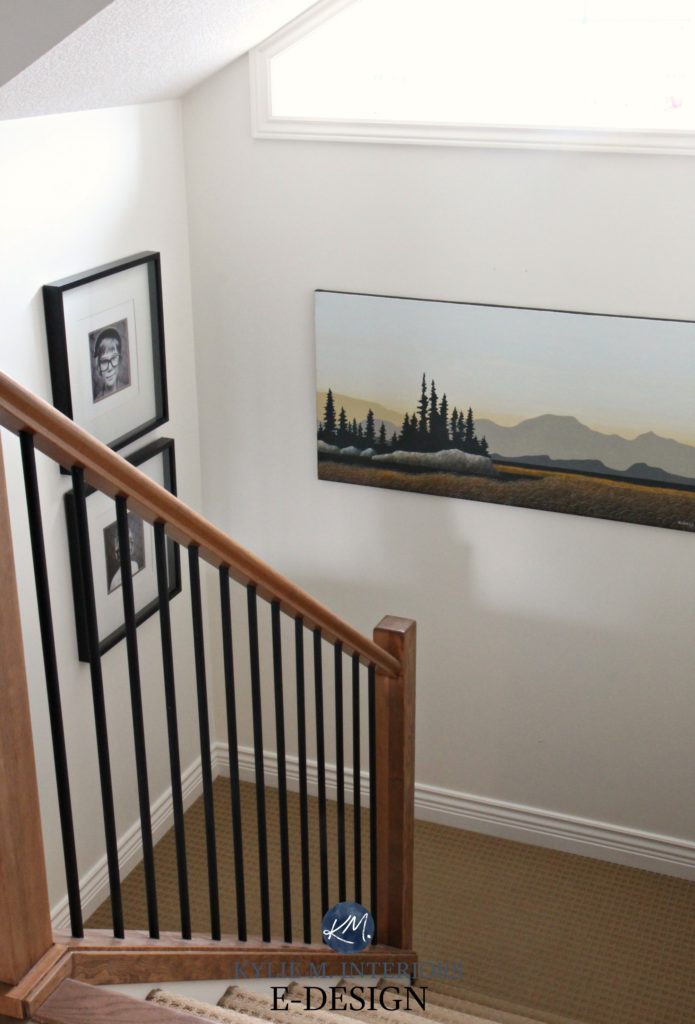
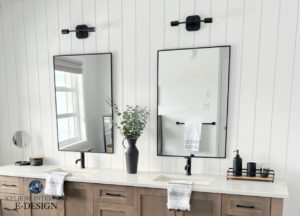
The 60-inch rule applies to this next photo as well, as the center of the two pieces as a WHOLE should sit approx. 60 inches from the floor…

This rule also applies to:
- Hanging art above the loooo (funny if you’re a hockey fan, especially the Canucks. Wait, nobody is a fan of the Canucks)
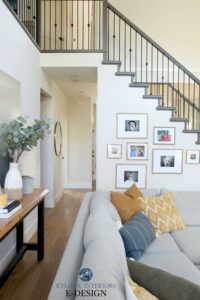
- Hanging a gallery wall. The CENTER of your arrangement should be around 58-62 inches from the floor
- Hanging art above furniture that’s SHORTER than 33″
Do you want to know a cool trick? Figure out where 60 inches is on your body (don’t get any ideas men, that’s wishful thinking). For me, being 5’3, 60 inches sits at my eyebrows, giving me easy eyeball measurements rather than having to bust out a tape measure every time.
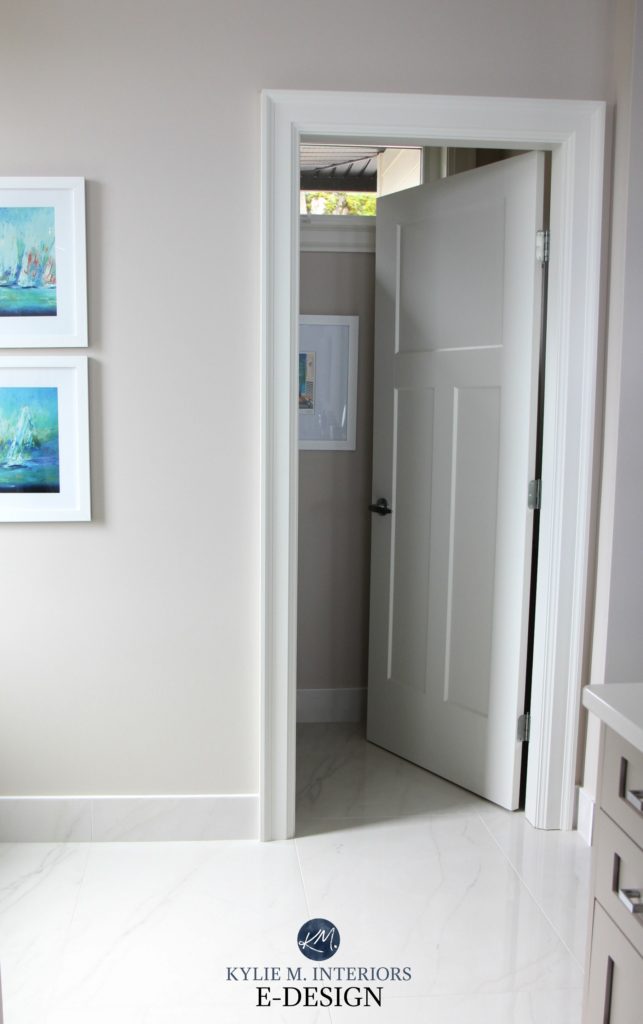
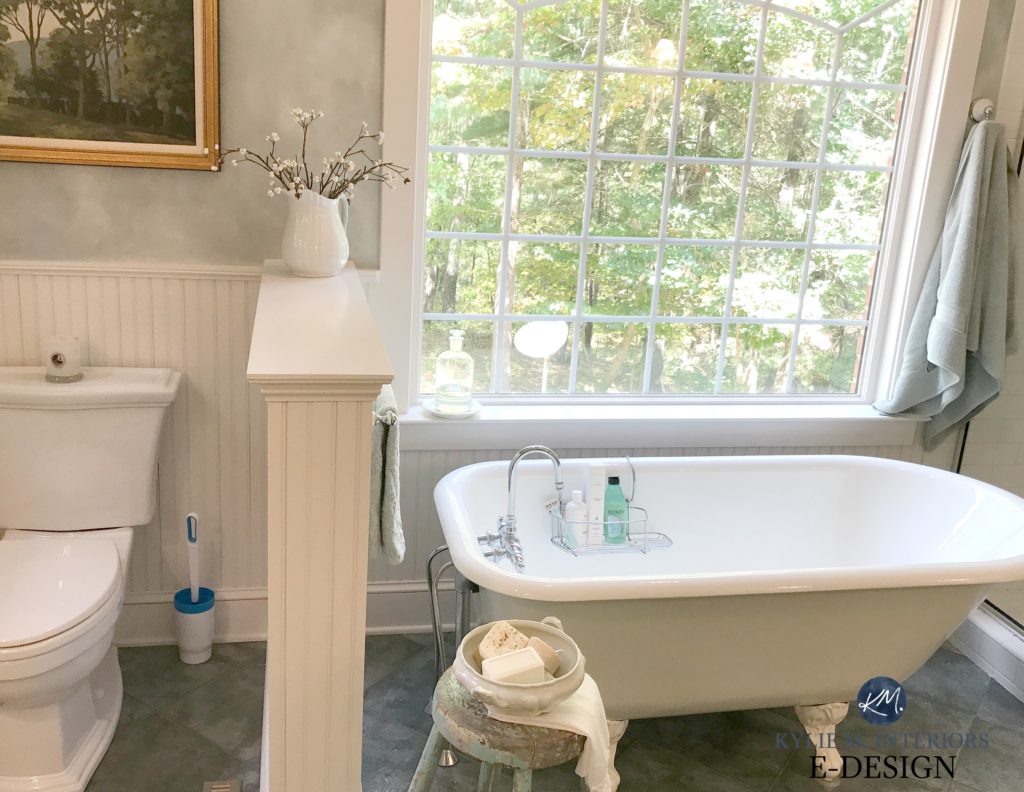
THE BEST HEIGHT FOR HANGING ARTWORK ABOVE WAINSCOTING
Again, we’re looking at the guideline of 58-62″. Or, depending on the height of your wainscoting/size of your art, approximately 4 inches above the top of the wainscoting.
This is a great example of art above a toilet AND wainscoting…will wonders never cease.
THE BEST HEIGHT TO HANG ARTWORK ABOVE A SOFA OR SECTIONAL
When you’re hanging anything above a sofa, whether it’s artwork, a mirror or a decorative piece, you’ll want approximately 8-12 inches of wall space between the top of your furniture and the bottom of your frame.

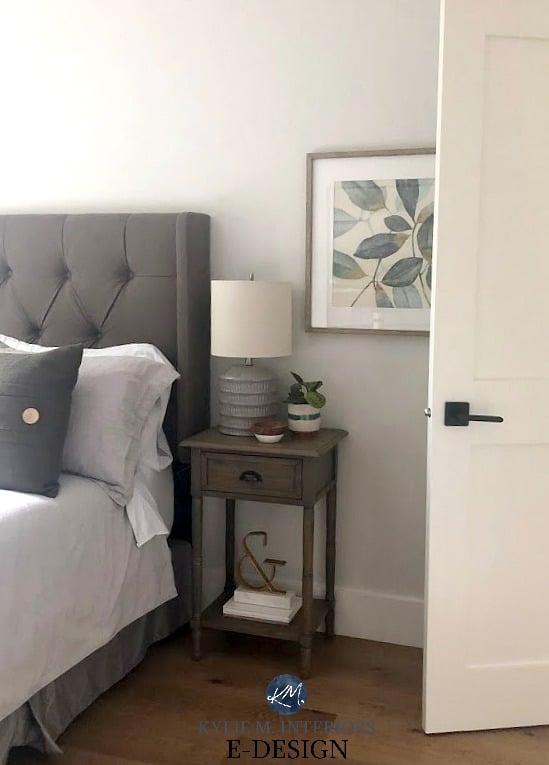
THE BEST HEIGHT TO HANG ARTWORK ABOVE A HEADBOARD
It can depend GREATLY on the height of your headboard, but generally, you’ll want approx. 5-10 inches of wall space between the top of your headboard and the bottom of your artwork.
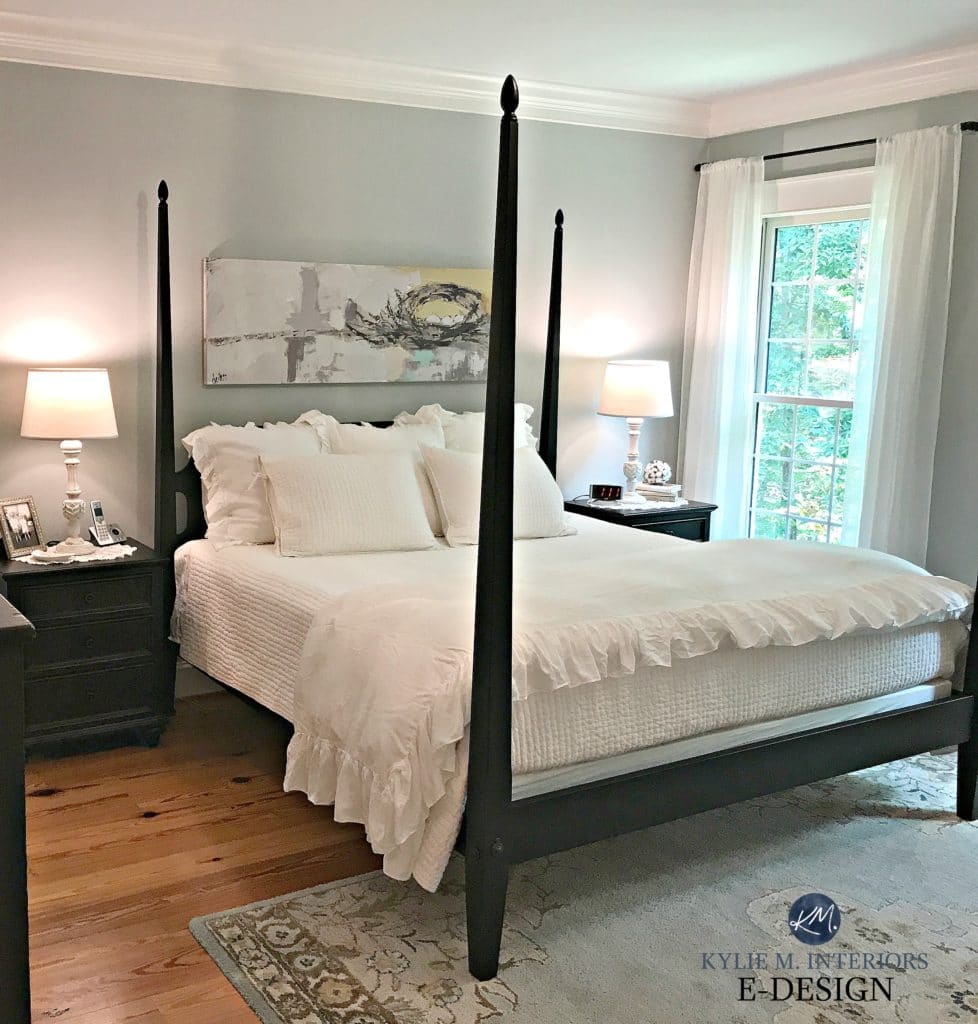
Whether it’s a sofa, sectional or headboard, if you leave TOO much wall space, there will be a disconnect between your furniture/artwork and they will act independently of each other, which is a BAD thing when it comes to decorating.
And you know what’s SO COOL? These are ALL photos of my E-Design client’s homes – real homes, real people, real budgets – LOVE IT!
THE RIGHT HEIGHT FOR ARTWORK ABOVE A FIREPLACE MANTEL
When it comes to fireplace mantels, we’re usually looking at 4-8 inches. If you have a large piece of artwork and an 8-foot ceiling, you’re more likely to leave 3-5 inches. If you have a standard piece and TALL ceilings, you might bump it up to 8 inches, but you still don’t want to break that visual connection between the fireplace and your hanging piece.
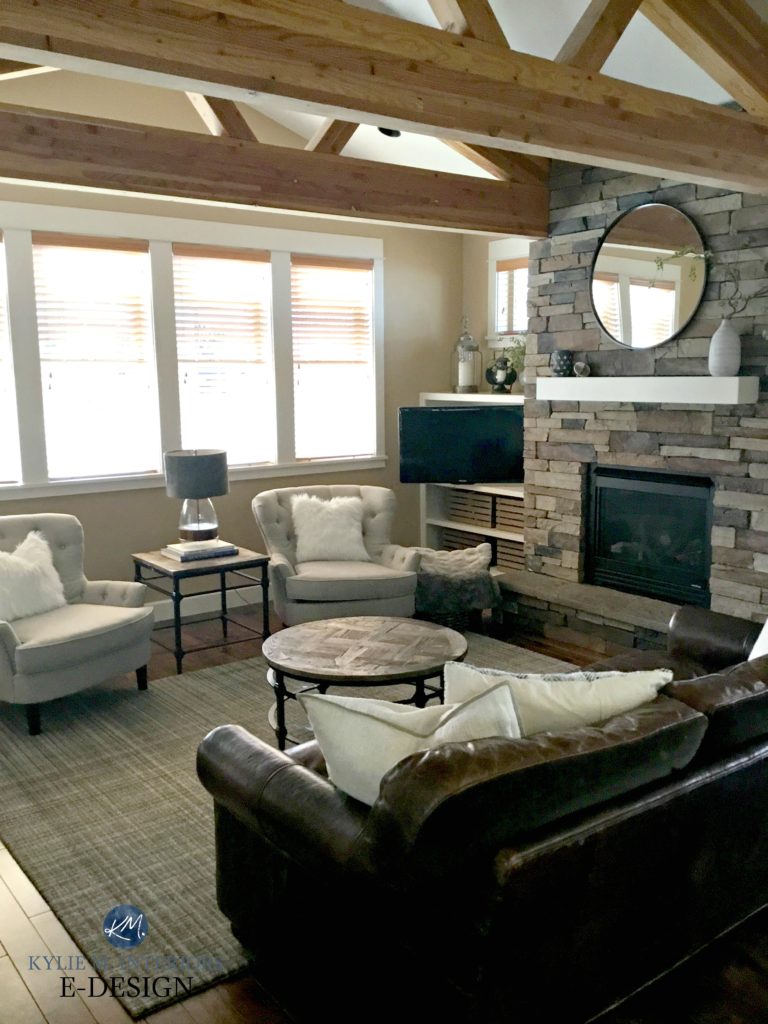
The HIGHER your mantel is, the less space there should be between your artwork and your mantel.
And did you know, I did an EXPANDED version of these ideas in my blog post ‘The Right Height to Hang Artwork and Mirrors‘? So, if you’re looking for more information or photos, check it out.
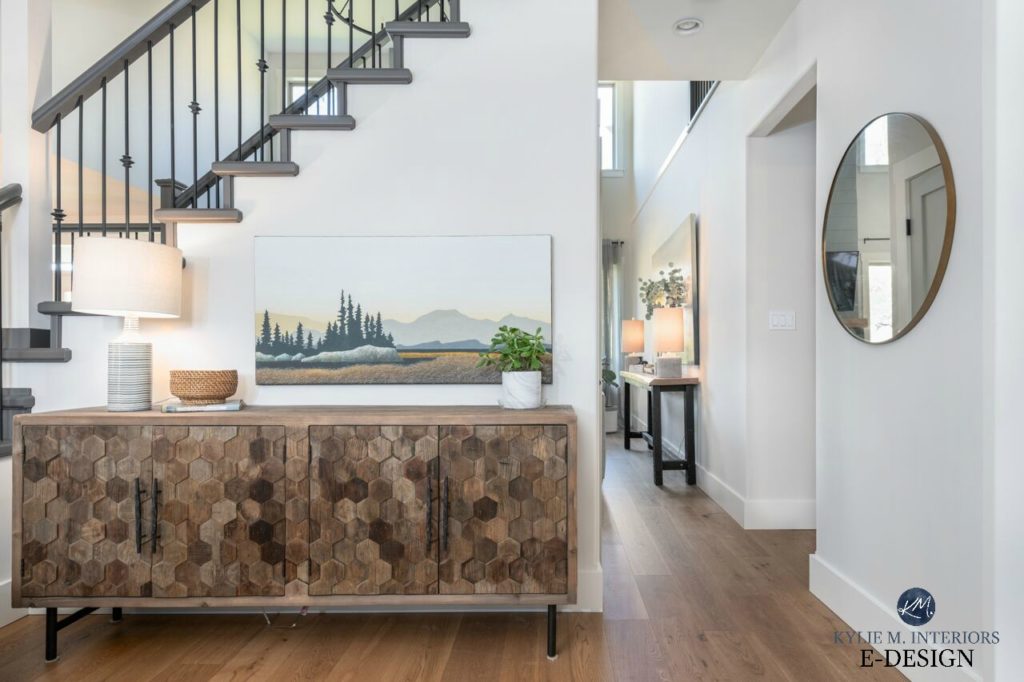
THE BEST HEIGHT FOR HANGING ARTWORK ABOVE FURNITURE THAT’S TALLER THAN 32 INCHES
Let’s keep this nice and simple – 4-6 inches. BOOM, done.
Do you have an OVERSIZED piece of artwork? Maybe you should just read the whole blog post here: The Right Height to Hang Artwork Above Anything
2. Create a decorative vignette using pieces around your home
I love this one because once you learn how to do it, you can decorate almost ANYTHING – mantel, shelf, bookcase, bed – you name it, you can do it! The difference between a vignette and say, a mantel display is that a vignette is a SMALL-SCALE decorative display, whereas a mantel or shelf would be made up of MULTIPLE vignettes.
And I’m keeping it simple and straightforward here. I have a blog post that goes MORE in-depth, but these tips will DEFINITELY get you rolling down the right path (or stumbling if you took that bottle of wine comment too seriously).
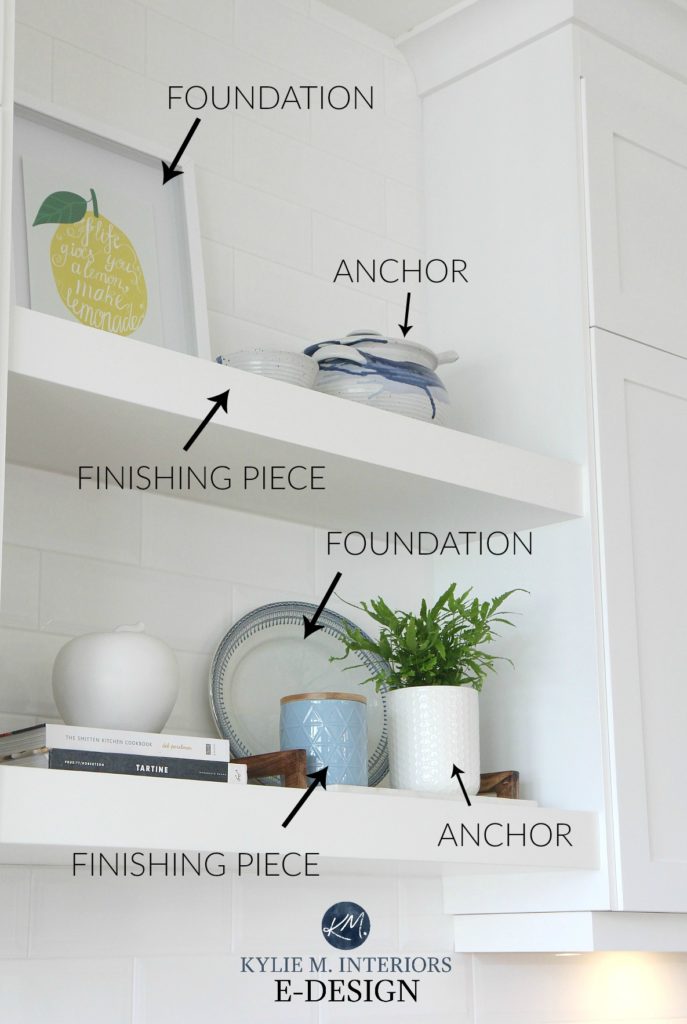
STEP 1 PLACE YOUR FOUNDATION OR ANCHOR PIECE
The foundation piece goes on the WALL if you’re decorating a flat surface with a wall space right behind it. If you don’t have a wall space, you’ll move RIGHT along to the anchor.
The foundation piece could be artwork, photography, metalwork, mirror, etc…
As for the ANCHOR PIECE, you need this item whether you have a wall space behind your display or an independent flat surface with NO wall space (ie: side table). Your anchor piece could be a vase with flowers, a stack of books with a decorative item on top – basically anything that is taller or larger/more noticeable than the other pieces. This piece often goes slightly further back and slightly to the left or right, but usually not as far back as the foundation.
And make sure you hang your artwork at the right height, based on the previous tips – I’m watching! Just joking. I’m not. Unless you leave your blinds open at night with the lights on, I will look.
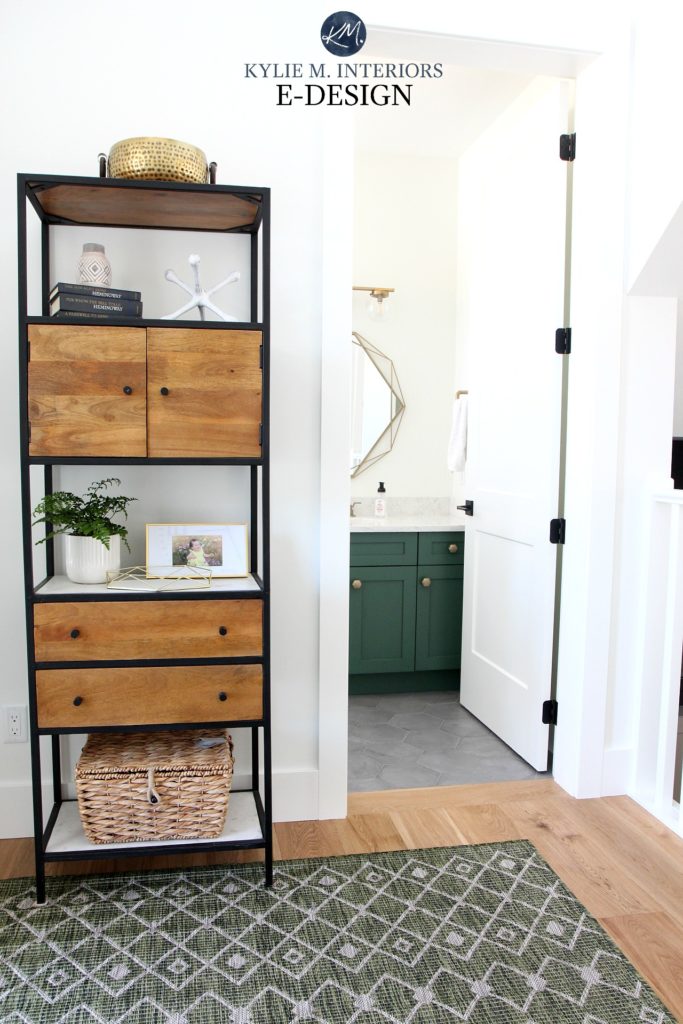
Now, that top shelf above could use a LITTLE love…
- Move the foundation piece closer to the center
- Move the large dish (anchor) to the left side of the shelf and smaller dish (finishing piece) to the right, overlapping the artwork and creating a decorative triangle
STEP 2 PLACE YOUR SECONDARY PIECE
The secondary piece doesn’t grab as much attention as the anchor but still carries its own visual weight. It’s usually shorter than the anchor piece and assuming you haven’t used it already as the anchor, this could be a vase, stack of books, candleholder, framed photo, etc…
In this next photo, because the artwork isn’t hung, it’s less of a foundation piece and more of an anchor. This leaves the plant as the secondary piece and the bowl as the finishing piece, which we’re going to talk about next…
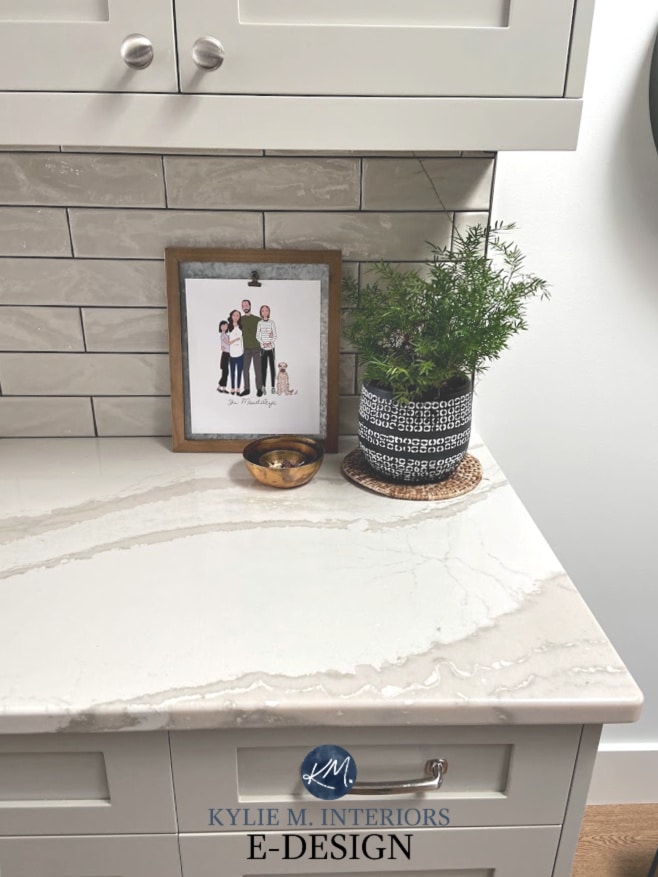
Is it PERFECT? Heck no. Could the proportions be better? Yup. But are the BONES in place? Is it a reflection of the people who live there? You bet your cute lil’ booty it is.
- The artwork is us, the Mawdsleys! It was created by Lindsay R Hopkins Art on Etsy. She even took a copy of how I write our last name for the Mawdsley – so cool. She gets all the info about the different family members, draws up the photo and you can then get it printed at your local printer on high-quality paper. And it’s even more special because my sis-in-law had it made for us for Christmas
- The wee brass bowls have some of the rocks that Maggie would bring me home from the playground in Kindergarten and Grade 1 – the prettiest ones, and a daisy chain that Cassie made me
- The plant is named Matilda and she’s almost like family…until I murder her, which I do to all plants
This next photo shows the bookshelf in our dining room, which is a whole MIX of vignettes, groups of threes, decorative triangles and more – you’d be AMAZED at how many of those pieces have sentimental value, and with a few key store-bought pieces, it all works!
STEP 3 PLACE YOUR FINISHING PIECE
This is the final touch and will round out your decorative triangle as well as giving you an effective group of three – both of which are IMPORTANT parts of a good decorative display or vignette!
Let’s look at the first display in a different way now…

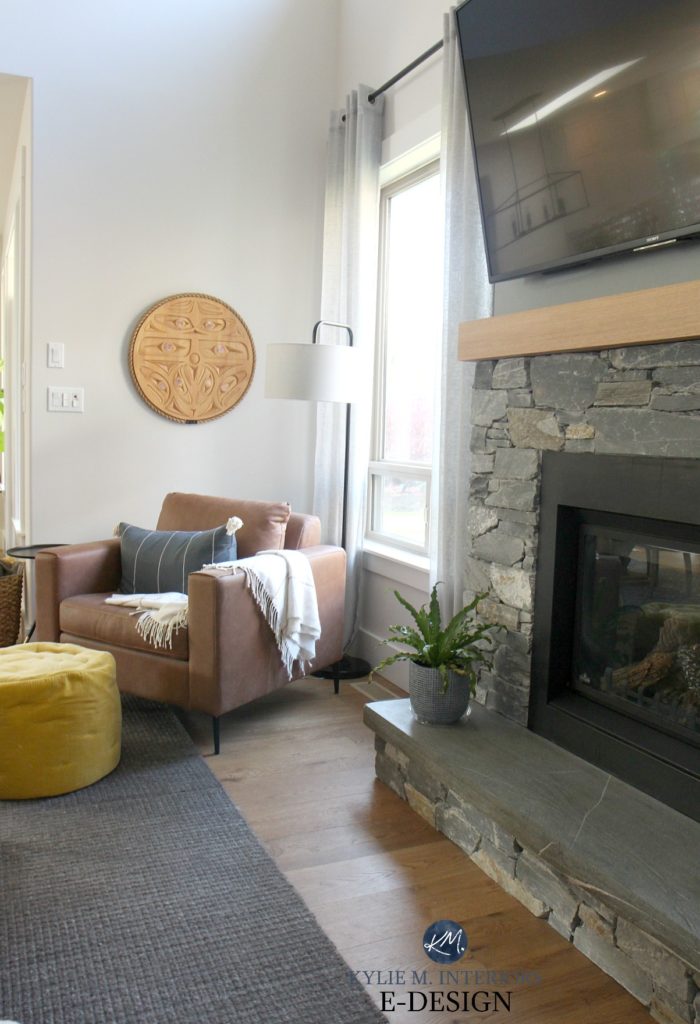
And did you know you can create a vignette in a corner using FURNITURE? True story. You’d use the same tips above, but they would apply to things like artwork/accent chair/side table/lamp, like these next photos…


Remember, if you’re excited to learn MORE about creating a decorative vignette, I have a more in-depth blog post right here: How to Create a Simple Decorative Vignette
Now, that was a LOT of info just on two topics, so for this next idea, I’m keeping things short n’ sweet – just like me (wink wink).
3. Hang your light at the right height
Nothing drives me crazy(er) than a dining room light hung at the wrong height! Okay, so maybe chewing is right up there, along with random nose sniffing, but lights are DEFINITELY in a hot second place. So, what IS the right height?
A LIGHT HANGING OVER A KITCHEN OR DINING ROOM TABLE
In the average kitchen nook or dining room (with 8-9 foot ceiling) the light should hang approx 36 inches above the tabletop (give or take 4 inches depending on fixture/ceiling height).
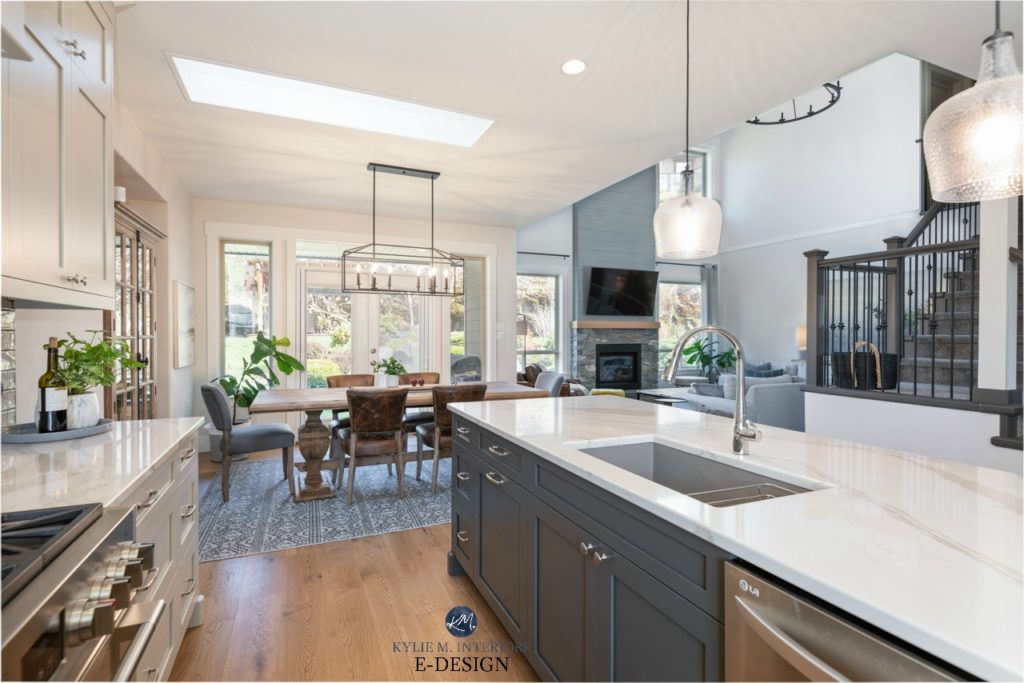
This is OUR home, see more of it HERE
LIGHTS HANGING OVER THE ISLAND
A pendant light hanging over the island should be approx 30-36 inches above the countertop, but of course, there are ALWAYS EXCEPTIONS. Remember, these are just some guidelines to get you thinking about things.
So, get your tape measure and step ladder out and see if YOUR lights are at the right height for what they’re hanging above!
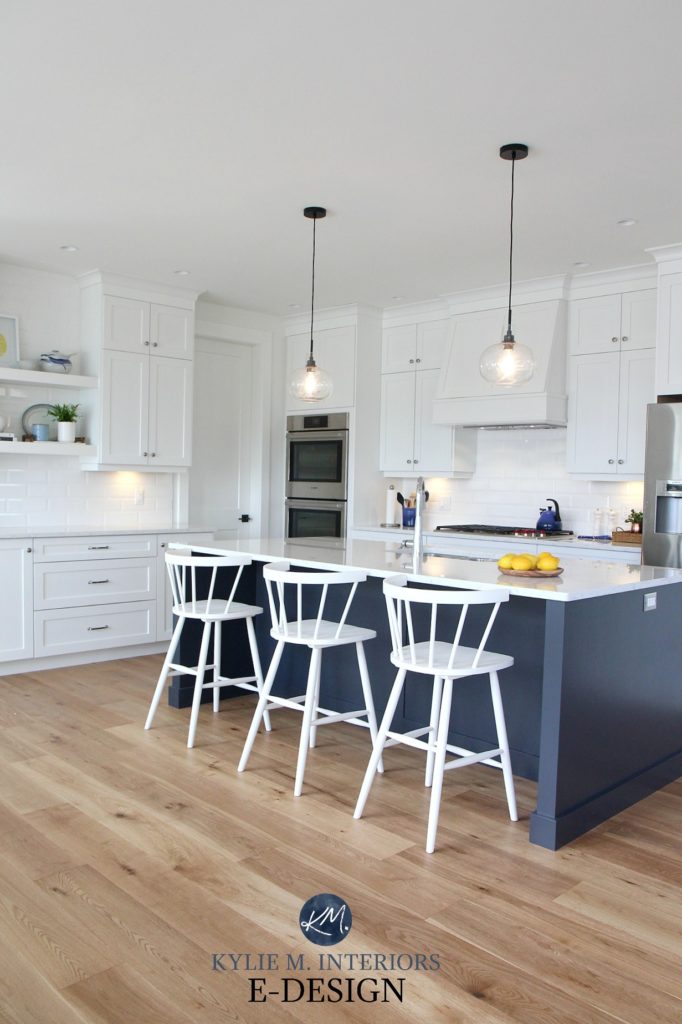
Check out more of this beautiful home HERE
Need more info? I have a BIG blog post on this topic right here: The Right Height to Hang Light Fixtures
So, there you have it. I hope these ideas get you excited to change a few things and TRY a few things around your home!
READ MORE
How to Redecorate Your Living Room Without Spending Any Money
6 Budget-Friendly Home Update Ideas
5 Ideas to Update Your Fireplace
How to Decorate a Fireplace Mantel
NEED HELP?
Check out my E-BOOKS or Online Paint Colour Consulting packages
Chat soon,

Share this!

Comments
Leave a Reply
More Posts
How to Turn Your House Into a Home: A Case Study
5 WAYS TO CREATE A HOMEY-HOME: A case study of OUR house! Between Pinterest, HGTV, Instagram, and design magazines, it’s easy to get caught up in what’s trendy and hipShare
Read More
KYLIE M’S 5 COLORS OF THE YEAR: 2024 Collection
REAL HOMES, REAL PEOPLE, REAL COLORS! When choosing my top colors for the year, I’m looking for colors that INSPIRE. Colors that talk to people (mind you, every color talksShare
Read More
Are White Walls, Cabinets & Exteriors Still Trendy for 2024?
Is the ALL-WHITE HOME still in style? Is white still in style as a paint color and interior finish? Are people still doing white cabinets, countertops, walls, and exteriors? AreShare
Read More

That was a great article, thanks.
I really like the painting in the stairwell in the article about picture height. Could you please advise the name of the artist?
Thank you.
Author
Thank you Kim! That’s Ken Kirkby, he is an amazing island artist!
Hi Kylie,
Is there anyway you could please post a picture of your homes exterior? You mentioned you’d blog about it and I am dying to see how you painted it!!! My house is so similar and I need some inspiration for a fresher lighter look! Thank you so much!! 🙂
Done.! went around my entire home and only had to lower two paintings of thirty. I guess my eye was better than I thought. Thanks for the article.
How high should a light fixture be in a living room with a vaulted ceiling?